This post was originally part of my series on Python for Feature Film on my personal site, but is being ported here with minor changes. The dates have been adjusted to match release dates for the projects.
In this second part of my blog series where I go over projects that I’ve worked on, with a focus on how I used Python, I’ll be analyzing Cloudy With A Chance of Meatballs 2. This was my first animated feature film, and my first film at Sony Pictures Imageworks.
Before I continue I’d like to give a little history. I’d just left Rhythm & Hues as my contract was expiring. Rhythm wanted to extend it, but Sony just had a better deal between a more stable job, much higher pay and the chance to work on the sequel to one of my favorite animated films.
I was hesitant to leave because Rhythm had been a great gig, but the opportunity was too good to pass up. In hindsight, this was a great decision because only a few weeks later, Rhythm fatefully filed for bankruptcy.
So begins my journey as a Pipeline TD, having transitioned from being a layout artist at Rhythm. Imageworks had taken a chance hiring me, and so far it looks to be one that’s worked out.
Animation vs Visual Effects Films
Sony Pictures Imageworks is unique in that it’s one of the few studios that works on Animated Features as well as Visual Effects. Seeing as I was changing from working on a Visual Effects Film to my first Animated feature, there were many differences to take note of.
Pros of Animation
Animated features have a lot going for them, and there’s a reason why many artists try and work on them.
- It’s so much more relaxing, at a slower pace and less overtime.
- There is no client, or rather, the client is on the same team as you.
- They understand better the struggles of creating the imagery because they’re in the trenches with you, and there are fewer mad crunch times.
- Teams are larger. Just the Animation department alone can eclipse the size of an entire visual effects team.
- This means work is more spread out and crunch time is easier to deal with.
- You can deal with tasks on a sequence level rather than a shot level most of the time.
- This is because entire sequences are cut from one source, whereas in VFX films, each shot is its own beast.
- You really get to feel like you’re crafting the movie. Even in Pipeline, you can have some influence over the final result, rather than in Visual Effects where you often feel like a cog in the machine.
Cons of Animation
It’s not always peaches and sunshine though. There are some downsides to it as well.
- You work on the project for much longer. It can get quite boring seeing the same shot on your screen 2 years later.
- Teams are significantly larger, this means you don’t form as close bonds with your coworkers, and communication can be a real challenge. The show is now a giant lumbering machine, rather than an agile one.
- As a Pipeline TD, there are fewer chances to do something really cool because the teams are so much larger, that tasks are shared around a lot, and you may have little to do.
- There’s less of a cool factor. You’re often relegated to working on just a “kids film”. The Visual Effects films are the ones that often get the oohs and ahs.
Similarities
At the end of the day though, it’s not really all that different
- Our pipeline at Imageworks is largely shared between Visual Effects and Animated movies. This means for the most part, you don’t have to consider them different at all.
- Often you still have focus tests, marketing etc… on both that require crunch time. It’s not always smooth sailing, and I never go into a project thinking it’s going to be easy.
Python Tools for Cloudy With A Chance of Meatballs 2
There were quite a few major tools that I made for this show using Python. I’ll go over them here. These have persisted through tons of Imageworks’ future projects as key tools in their pipeline.
Deep Compositing for Animators
Cloudy 2 had a lot, and I mean a lot,of background characters. This meant that shots couldn’t just be animated by a single artist and often had to be split up between multiple animators just to get it done in a realistic amount of time.
We have some great crowd tools that let us instance animation around the scene, but for many of these shots we needed unique, hero animation for (in some cases) a 100+ characters in a shot.
To help with this, I developed a tool that takes our Playblasts (OpenGL captures from the animators scenes) along side a depth output, and then use this inside Nuke to combine them using depth. This is a bit of a remedial use of deep compositing, but it’s quick, effective and animators can see the combined results of their scenes in under five minutes. This was done at the request of the animation team who were required to pull off large art directed character shots, where conventional collaboration methods simply weren’t scaling.
Since playblasts are a natural byproduct of animators working, there was no overhead other than enabling depth write outs for all their playblasts if certain criteria were met.
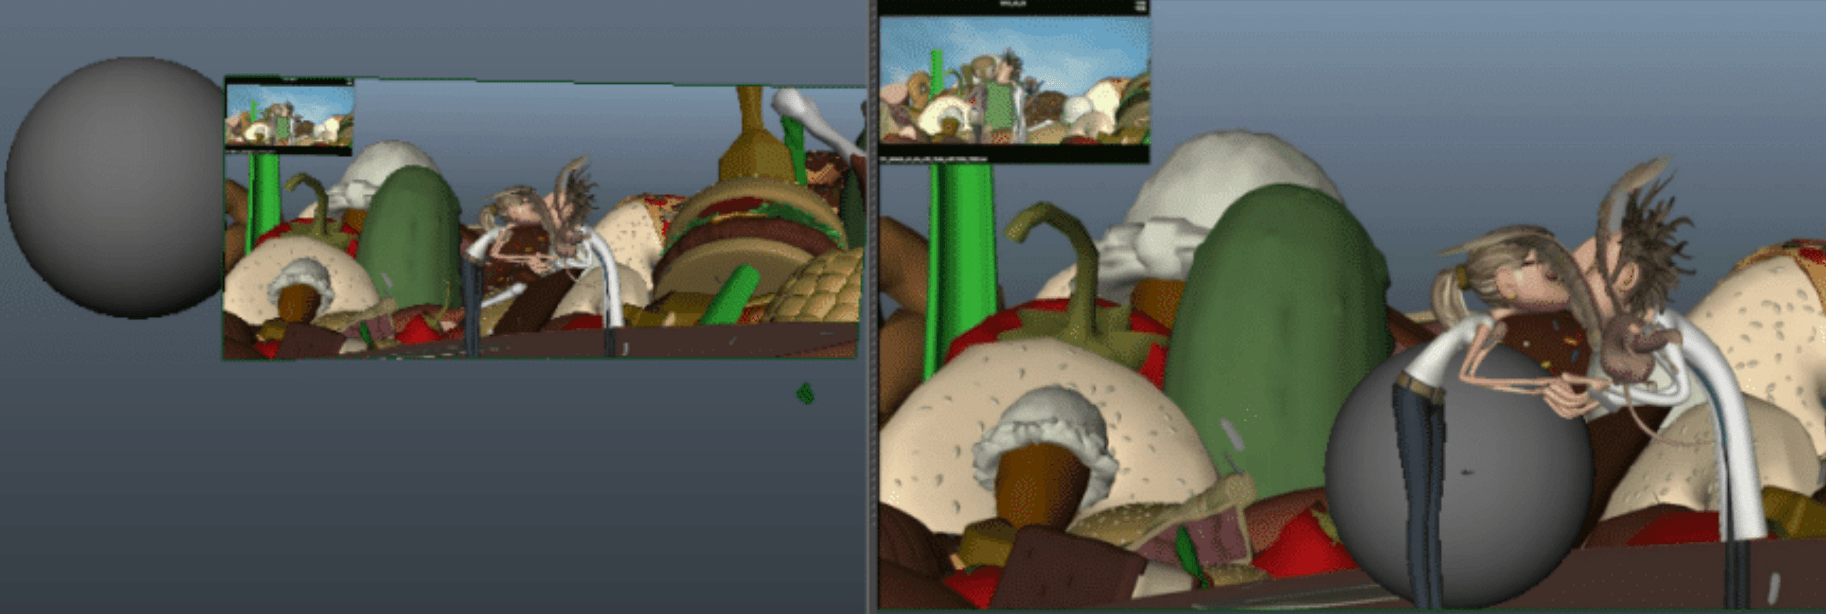
This can go even further though. Using the same depth compositing, we can bring the data right back into Maya again as an image plane. Maya’s viewport supports a single depth composited image plane. This means an animator can bring in either a single playblast or a combined output, and put it on an image plane.

On the left you see the Imageplane is completely in front of the sphere, but on the right it's composited in depth, between the characters and the foreground
From the shot camera, this 2d image is now properly composited into depth and you can move around the objects in the image as if they’re in the scene. It’s really quite cool to see.
Again, this process requires very little extra data, and no new workflows for the animators. It just provides a very natural way to get quick, iterative feedback on their scenes.
Texture Variations
Throughout the course of the movie we’d make constant reuse of the same geometry but have varying textures for them. Traditionally lighting would just choose which texture they wanted, but for Cloudy 2, we wanted Animation to have control over it because they fed into gags in the shots. Rather than have these be rigged assets or anything complex, we decided to keep it simple.
I built a tool that would show the animators any available textures for their assets, let them select which one they wanted and then let them apply it. They could do this for several objects at once. Once they chose the textures, it would then be tagged to the geometry as an attribute that would then be picked up by the lighting template so that lighters didn’t have to even give it a second thought.
We used this for a lot of objects, from candybars, to ships to random objects in the scene that needed a little breakup.
In the sequence above, all the candybars and paint explosions were handled by the texture variation tool
Grouping Characters in the Scene
So not all of the tools we build on a show are this complex.
An example of a simpler tool I built that was pretty useful was in regards to a stadium scene in the movie. We had hundreds of characters that we needed to organize into sections.
This was a simple system of:
Get a list of all the characters in the scene. Find their x,y,z positions in the world. Sort them into sections based on the seats around them and their position. Like I said, something really simple but even that can prove to be really useful in production.
Publishing Frontend
Like most studios, Imageworks has a very well defined publishing system to get data from one department to another.
Unfortunately, while the backend of our system was very well defined, the frontend system that was exposed to the artists was not.
This consists of these few basic ideas:
- Artists select which assets they want to publish
- They can configure a few options
- The tool runs some validation tests
- It then publishes the scene once all tests have passed
This gives us a reasonable safeguard against bad data making it to the next department, and lets us catch issues early.
Our old framework for this was old, and while the design was good, the implementation made it very unfriendly for artists, but also really hard to maintain and to add new tests. Additionally, a lot of it was in MEL.
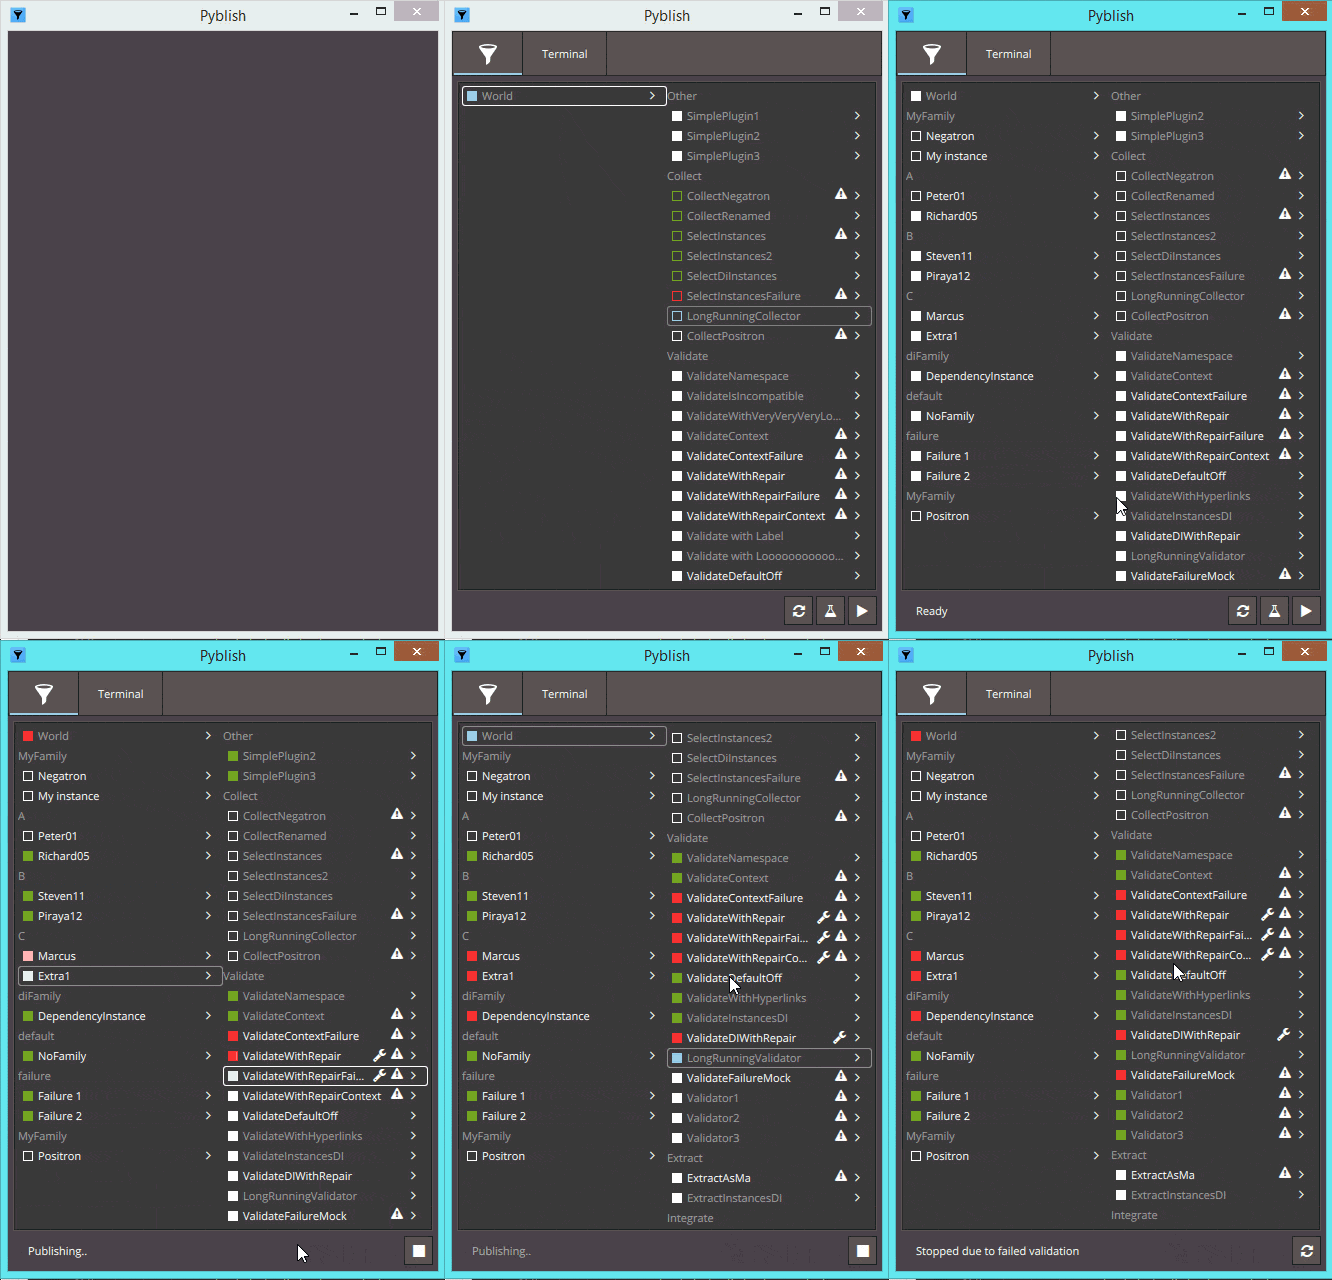
So a coworker and I were tasked with coming up with a new framework, built from the ground up in Python. We’d still use the same backend for publishing on our computer farm, but the frontend would be much more artist friendly and make it much easier for a TD on a show to add tests.
We’d built this towards the end of Cloudy 2, and we decided to beta test it on the ill fated test for Popeye
